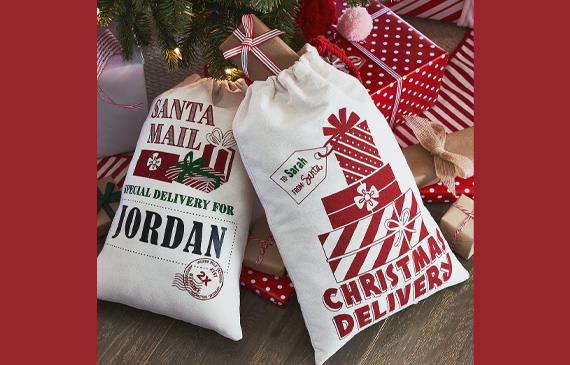

From MICHAELS
Personalize these pre-printed Santa sacks with your Cricut machine. It doubles as a gift bag and a tag!
YOU’LL NEED
1 Siser EasyWeed Heat Transfer Vinyl
1 Siser Glitter Heat Transfer Vinyl
1 Loops & Threads Straight Scissors
1 Cricut Maker
1 Siser Heat Press, 9″ X 12″
1 – 2ct. Santa Sack with Rope by Celebrate It
DIRECTIONS
1. First, design the name (or message) to be added to the sack.
2. Click ‘Make It’ in the upper right corner of your screen.
3. In your preview screen, check ‘Mirror’ in the left panel for each mat, to reverse your image.
4. Now, click ‘Continue’ in the bottom right corner of your screen and choose the correct material.
5. Place the iron-on material, shiny-side down, onto your cutting mat. Load the mat into your Cricut machine, then press the blinking Cricut icon to start cutting.
6. Once your machine is done cutting each layer, use scissors to cut your design from the iron-on material roll. Next, use your weeder tool to remove all the excess material around and inside your design. You’ll be left with just the reversed design on the clear plastic carrier sheets, which are slightly sticky.
7. Preheat your Siser heat press according to the included directions
8. Follow the instructions to press the name or message to the Santa Sack.
9. If your material is the warm peel type, you may go ahead and peel off the carrier sheet. If your material is a cool peel type, let it cool completely before removing the carrier sheet.
Share your project photos with #MakeItWithMichaels
Find this craft and more holiday fun at Michaels.com