From MICHAELS
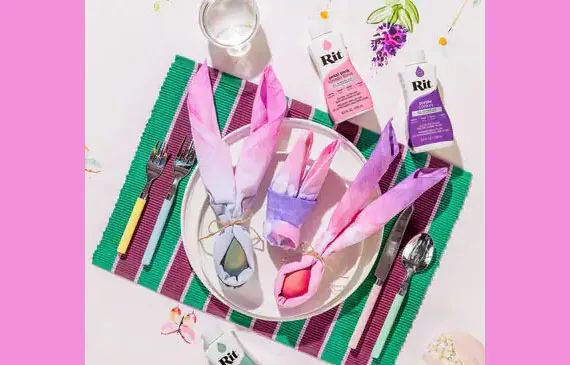
Hop into spring with these vibrant Dip Dyed Easter Bunny Napkins inspired by radiant heirloom carrots.
YOU’LL NEED
Plastic table cover
Celebrate It Solid Cotton Napkins
Tulip Rubber Bands
Small plastic containers
Measuring cup
Rubber gloves
Creatology Wood Craft Sticks
Measuring spoon
Liquid dish detergent
Paper towels
Make Market 2.5” Fillable Wood Eggs
Salt
Ashland Natural Jute Twine
Rit Color Stay Dye Fixative
Rit Liquid Dye, Purple
Rit Liquid Dye, Petal Pink
Rit Liquid Dye, Sage
Loops & Threads Straight Scissors
DIRECTIONS
1.Cover your work area with a plastic table cover. TIP: For best results, prewash napkins, rinse and leave wet. This will help to remove any finishes that may interfere with dye absorption.
2.Lay napkin flat on clean surface.
3.Roughly pleat one corner of the napkin and secure with rubber bands; then repeat to gather on the opposite corner for the “ears” of the bunny. Set aside.
4.Fill 2 to 3 small containers with 4 cups of very hot tap water (140 degrees)
5.Wear rubber gloves and add your dye to water; stir well with a jumbo craft stick.
6.Add 2 tablespoons salt to dyebath; stir well as the salt helps to intensify the dye.
7.Add a squirt of liquid dish detergent. Stir well.
8.Test dye by dipping a paper towel into the dyebath. TIP: If it is too light, add more dye; if it is too dark, add more water.
9.Fold wet napkin in half so that the two gathered corners align.
10.Wearing rubber gloves, dip the gathered ends of the napkin into dyebath until you reach the rubber bands. Move the napkin slowly up and down and back and forth. Continue dipping napkin until you are satisfied with the dye. This may take 5 to 10 minutes. Dye will look darker when wet and prior to washing.
11.Place wooden Easter eggs into dyebath and stir until desired hue is achieved. Rinse in cool water and let dry.
12.Repeat to dip dye the opposite end into another dye of your choice.
13.When satisfied with the outcome, remove napkin from dyebath(s). Wearing rubber gloves, squeeze out excess dye and set napkin aside. Continue dip-dyeing each napkin, one at a time, until all the napkins have been dyed. TIP: To enhance the dye and reduce bleeding, immerse the dyed parts of the napkins into Rit ColorStay Dye Fixative for 20 minutes, following package instructions.
14.Rinse napkins under cold running water until water begins to run clear. Then wash in warm water with mild detergent, rinse and dry.
15.Once dry, fold and tie to create desired shape. Roll napkins from one corner to another. Place dyed wooden egg at the middle of the rolled napkin and fold over in half. Use twine or ribbon to tie a bow right above the egg to secure.
Find this craft and more holiday fun at michaels.com